Setting up a Debug Environment
The micro:bit v2 supports debugging over its provided programming port, allowing you to view the contents of memory and control the stepping of execution at runtime. To access this functionality, we will use Visual Studio Code with the marus25.cortex-debug extension, along with one of OpenOCD or pyOCD to provide debugging interaction with the micro:bit v2’s Cortex M0 (nRF51822) CPU. The selection of these should largely not matter, as they both provide sufficient debugging support for the extension that will interact with them.
Installing Visual Studio Code
To begin with, we should first install Visual Studio Code. If you’ve already done this, skip straight to the next step. For users on Windows, you should download the latest version found at the official download page. However, if you’re on a Linux distribution or MacOS, you can likely install it straight from your package manager or via. Snap:
sudo apt install software-properties-common apt-transport-https wget -y
wget -q https://packages.microsoft.com/keys/microsoft.asc -O- | sudo apt-key add -
sudo add-apt-repository "deb [arch=amd64] https://packages.microsoft.com/repos/vscode stable main"
sudo apt update
sudo apt install code
sudo xbps-install -Su code-oss
brew install --cask visual-studio-code
sudo snap install --classic code
Once this is done, you should also install the marus25.cortex-debug extension from the extensions marketplace. This will provide interaction between the VSCode debugger and either OpenOCD or pyOCD, allowing us to interact with the micro:bit. Before we can utilise this extension though, we must first install either OpenOCD or pyOCD.
Installing OpenOCD
If you have chosen to install OpenOCD, it is available officially through most package managers on Linux, through brew on MacOS, and through an automatically generated release binary from Github for Windows MinGW32 users. There are also alternative unofficial binaries provided by the xpack-dev-tools project, which provide binaries for MacOS ARM64, MacOS x64, Windows x64, Linux x64, and Linux ARM64. If you simply wish to install through a package manager however, you can do that like so:
sudo apt install openocd
sudo xbps-install -Su openocd
brew install open-ocd
Packages installed through package managers are not always guaranteed to be the latest version of the software, especially on non rolling-release platforms such as Ubuntu and Debian. If you require features that are only available on the latest version of these softwares, then ensure your package manager has the appropriate version, or install directly from the developer releases.
Installing pyOCD
If you have chosen to install pyOCD, you can simply install it through the developer’s official PyPI package. Ensure you have python3 installed as a package beforehand.
python3 -m pip install -U pyocd
If you have not previously installed tools through pip before, you may also need to add the Python .local/bin folder to your PATH. To do this on Linux, in .bashrc (or any similar shell config file), add the following:
export PATH=~/.local/bin:$PATH
This will require a fresh terminal to take effect. Once PATH is updated, you can verify pyOCD is installed correctly by running pyocd --version.
Starting the Debugger
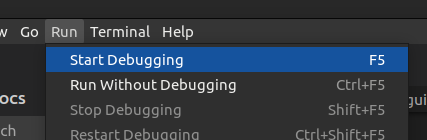
To begin debugging a micro:bit v2 program, first ensure that your program is built with python3 build.py, and then select the Run -> Start Debugging option from the Visual Studio Code toolbar. This will then prompt you to select either OpenOCD or pyOCD. Select the one that you installed in the prior steps, and the debugger should begin. To stop the debugger at a specific point, set a breakpoint in the editor by clicking to the left of the line number column in the editor window.